Welcome to Flowmo! We are thrilled to guide you through the process of creating a basic and animated landing page from scratch today.
For those of you who are new to Flowmo, this platform is a revolutionary tool for designers. It dramatically cuts down design time while incorporating capabilities ranging from animation to automation, all without the need for developer intervention. This means you can achieve high-performance websites and swiftly move from design to live production.
With Flowmo, if you can envision it, you can launch it.
Let’s dive in and build this landing page together. With 5 simple steps you are ready to get started:
- Get to know your workspace
- Setting up your project
- Designing
- Animations and Integrations
- Publishing to production
Follow these five straightforward steps, and you’ll be able to achieve what we’re demonstrating today.
Get to know your workspace #
Our journey begins in the Flowmo dashboard. Here, you can manage your projects.
The design environment in Flowmo is intuitive and familiar, resembling standard design software, which helps you navigate confidently. Here, you can manage files, save, export, and adjust your workspace settings.
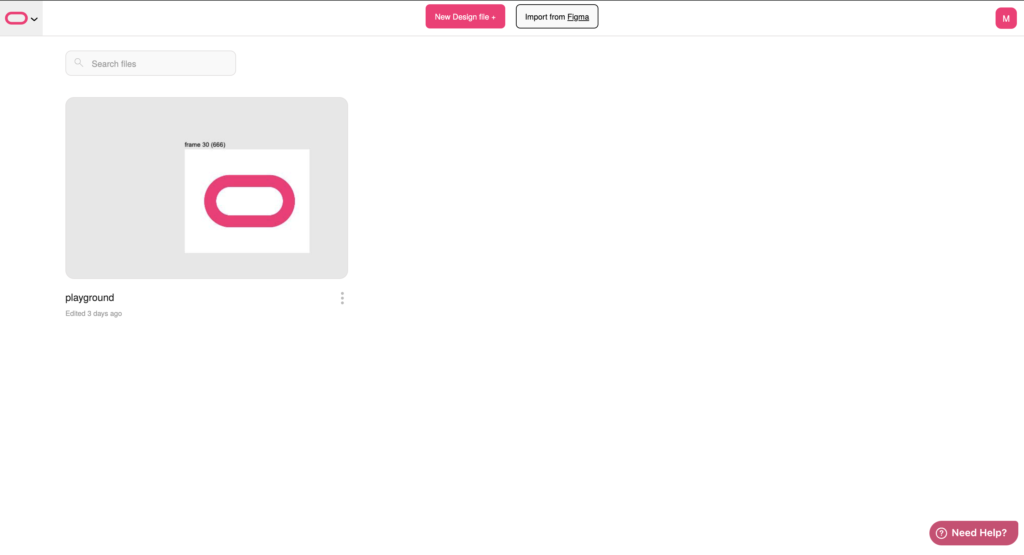
On the right hand side you can start a new project, import files or toggle settings like dark mode.

On the left hand side you have your user management
In the center you will see all of your projects that have been worked on in flowmo. You can also use the search bar to filter out and find your project you are looking for.
Selecting to import a file you can import a design file created in Figma and continue to edit and animate it preparing it for production in minutes! We will guide you more on that in an upcoming tutorial.
Ready to start a new project? Simply click on create a new file and name it to begin.
Setting up your project #
Welcome to Flowmo’s design environment! If you have prior experience with standard design software, you’ll find the interface quite intuitive and easy to use.
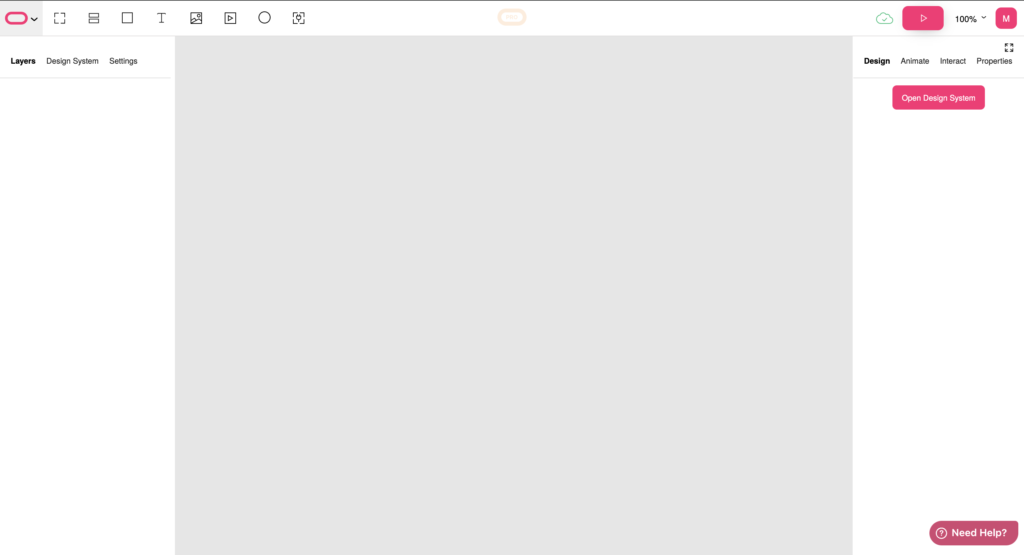
On the left-hand side when clicking on the Flowmo icon, you have the functionality to navigate back to the dashboard, as well as options to save, export, or alter the theme of your workspace.
The right side of the screen is where the creative process comes to life. Here, you will set up your designs, define animations, and adjust some technical settings. As you begin your design journey, you’ll encounter a range of familiar tools, along with several unique features exclusive to Flowmo.
At the top of the interface, you’ll find essential design tools such as shapes, text, and video. The platform features auto-save, which ensures that your work is continuously preserved. Additionally, a clickable PRO button enables access to advanced editing options, although we’ll focus on the basics for now.
Start by uploading your brand fonts in the settings accessable from the right hand sidebar, ensuring consistency in your designs.

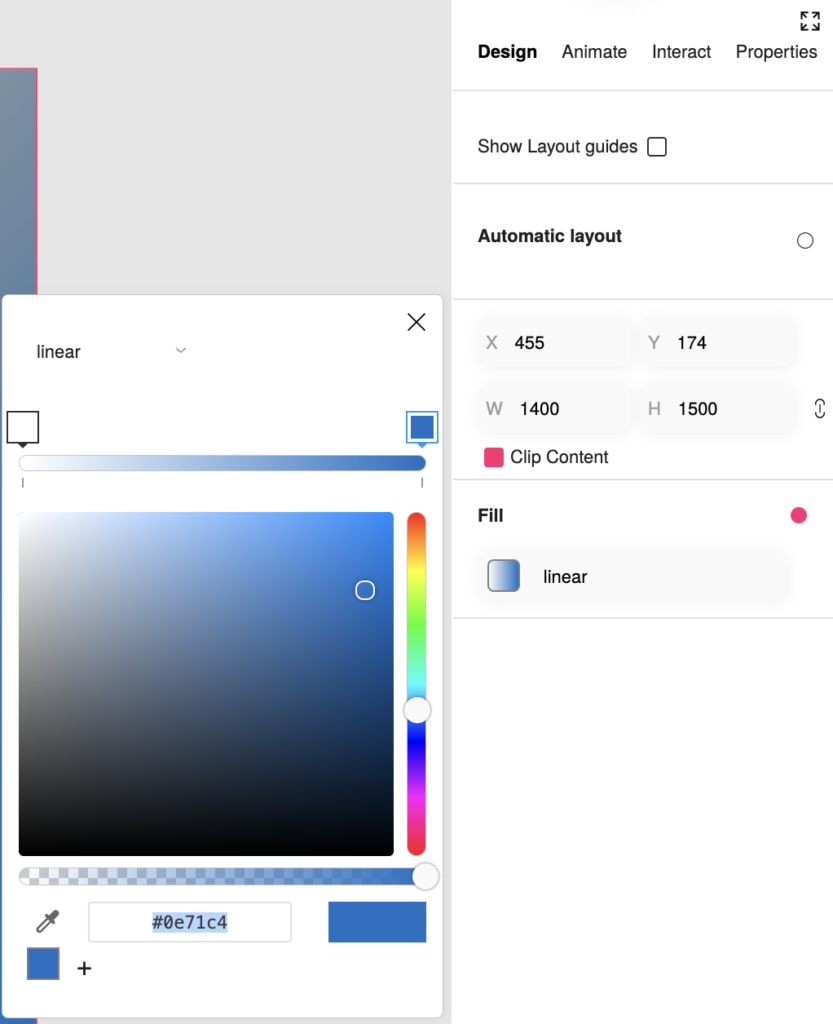
Next, on the right hand side define the dimensions of your landing page frame and on the lower part of the sidebar add colors to your brand’s palette. You can use RBG colors or Hex colors. On the bottom right hand part of the box you can click on the plus to save the color for working with in your project.
Now you are ready to design!
Designing #
We recommend making sure you have the following elements as part of your landing page. However its all up to you! Anything you design will be created as a live asset once you publish your page.
- Background: Start by defining the background with a chosen gradient and adjust the colors to fit your brand. You can change the fill type and manage the gradient by selecting the fill option on your right hand bar and selection an option from the drop down on the top left corner. Each options will open with its own settings relevant to the selection if there is an option to edit.

- Top Section: Add your logo using the add image icon on the top toolbar and create a button inside the frame by using the image you have added or adding a new shape. On top of that shape add a text layer and selecting colors for it. You can always use Auto Layout in the right hand toolbar for automated spacing adjustments based on the size and alignment of the frame.
- Text Elements: Set the text size, color, and font for your headline and paragraph, aligning everything for visual harmony.
- Additional Elements: Enhance your page by adding more buttons and icons. Import these elements from other design programs if needed.
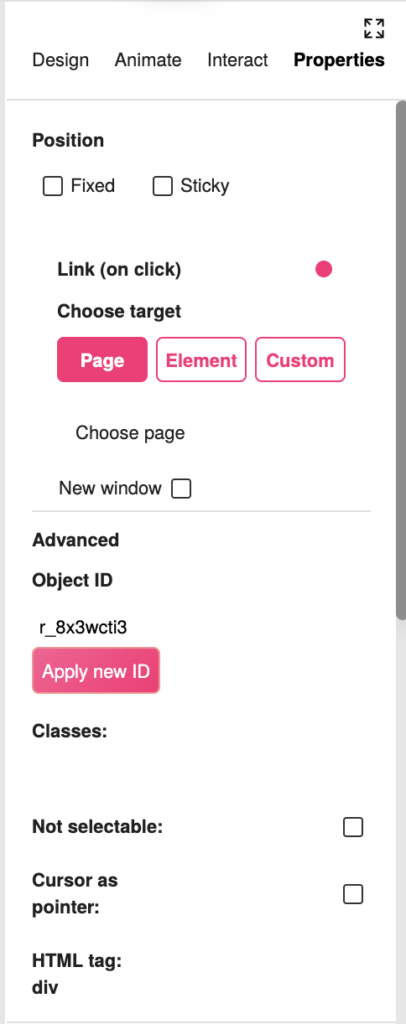
- Interactivity: Establish link interactions and hover effects, integral for the final user experience. To manage this click on the element you wish to turn into a clickable button and on the right hand toolbar navigate to properties. Click on the radio button “Link” and define the target for the element. Please note you can also update the HTML tag as well as assign a ObjectID for accessibility applications
Animations and Interactions #
Incorporate basic animations to bring your page to life. As this a getting started guide we will not cover right now all of the virtually endless animation capabilities but only review how to use the basic animation and integrations settings. Future guides will review animation by animation with examples that can be used to copy from or just to help your imagination get a kick start.
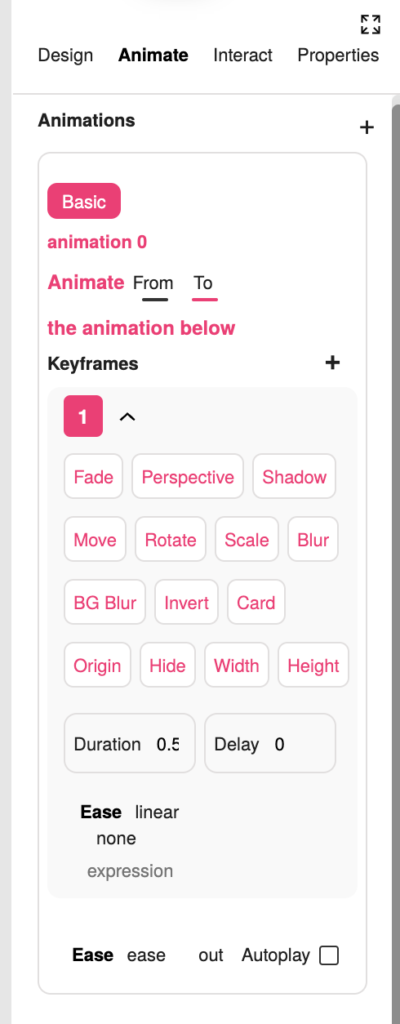
To start animating select an element you would like to animate. Go to the right hand toolbar and click on animation. Select basic animation on the top. You will see that you have the following options to work with.
Animate: From and To – select if the current state of the element should be the starting point of the animation or the ending point of the animation.
Keyframes: Here you can select the type of the animation that will occur if the item is fade in or out, scale to look bigger, etc. You can always select more than one animation. For instance you can have an element move and fade away.
With the duration and delay you can configure how long the animation will last as well as when it will start. Immediately, wait for 1,2,3 seconds, your choice.
In the ease row you can configure the logic of how the animation will start as well if it will autoplay or ease in and out or just to one of the flows.
Have fun! Play with it! see what works best
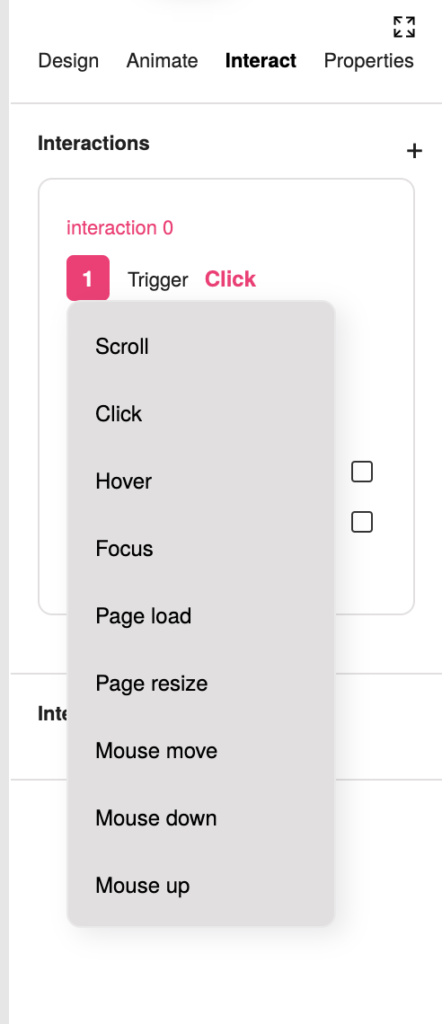
Lets move on to the interactions. Interactions are the triggers for the animations. So after you create the animation you can define how the user will interact with that animation.
Clicking on the Interact tab on the right hand toolbar you can click on + and add a new interaction.
First you will select the trigger to initiate the start of the animation.
Step 2 will allow you to chose the element you would like the interaction to run on. You can leave it on the current element or chose a different one using the selector tool.
In step 3 we will choose the animation that we would like to run as we have defined that already.
You can also select if there should be a yoyo affect, meaning to have the animation run forwards and then backwards, run reversed or set the loop duration in seconds.
You can set multiple interactions to any animation as well as the same interaction to multiple elements or groups.

Final Steps and Publishing #
Before you wrap up, make sure all interactive elements behave as expected by setting the cursor to pointer on clickable items. Preview your page to check the interactions and animations. To do this select the Play icon on the top right hand part of the top toolbar:

One thing to always check is the green cloud next to the play button. This shows you that all of your work has been saved and will not get lost. Autosave is by default on for all users. However if you have just made a major change and you would like to preview the site you can click on the cloud and that will force save your latest work.
If everything is looking good, Lets push to production!
To be able to push to production or export your work to any of the many platforms we support go into preview as explained above.
Here you have 3 main options when you click on the publish button.

- Sharing your preview – if you click on this a full and real version of your site will be uploaded to flowmo’s production servers and will be available live with a flowmo URL to share and collect feedback from your customers. The URL will be auto copied to your clipboard. Take note it takes 1-2 minutes for the site to become live and accessible.
- Publish live will allow you to publish the site live as planned. If you have configured a custom domain this will also update that domain and save it in the correct option you have selected in the settings menu of the project. More on those settings in a separate guide.
- Finally you can download a full HTML zip with all of the site ready for use an hosting on any platform supported. Setting this can be done in the settings menu. More on those settings in a separate guide.
Once everything is set, publish your landing page live to share your creation with the world!
Wrapping this guide up #
Thank you for following this guide. Explore more resources and tutorials to deepen your understanding of all that Flowmo has to offer. Don’t forget to check back here for more guides and tutorials. We look forward to seeing what you create!


